Do you often scroll through Instagram and stare in ore at the hundreds of beautiful flat lays, effortless and chic, styled and floaty?
Do you think this is something you’d never be able to achieve yourself? Maybe you’ve tried and tried and just can’t get it right. Frustrated you end up using stock photography in the hope it will fit your branding, colour palette and flow of your feed.
I want to share some tips and tricks with you on how you can create your very own, professional looking image that you can then recreate again and again with different items in order to build your social media branding and engagement.
Firstly, pick a story you want to tell. Choose a theme you want to use, this could be behind the scenes of a recent job you’ve finished, a product you sell or just a lifestyle image you want to create to tell a personal story.
Think of your business branding and colour palette, think about choosing props and objects that are in keeping with your branding, so if you’re a florist and it’s coming up to Valentines you may want to show off your latest pink bouquets for customers to send to their loved ones.
Gather props in the same colour tones as your pink bouquets. Ribbons, twine and a pair of scissors in a rose gold or pink, if you use gloves add them in too. Petals in the same tone and a pink cup with your favourite coffee or tea, adds a personal touch. Maybe add a pretty notebook or a valentine card and a pen. (not a Bic biro though)
Use leaves and find a beautiful tabletop, (wood, plain white, marble or metal work well with these style of shots) to use as your background.
Make sure your table is side on to a large window or somewhere with lots of natural light.
Now let’s start building your image.
Step 1
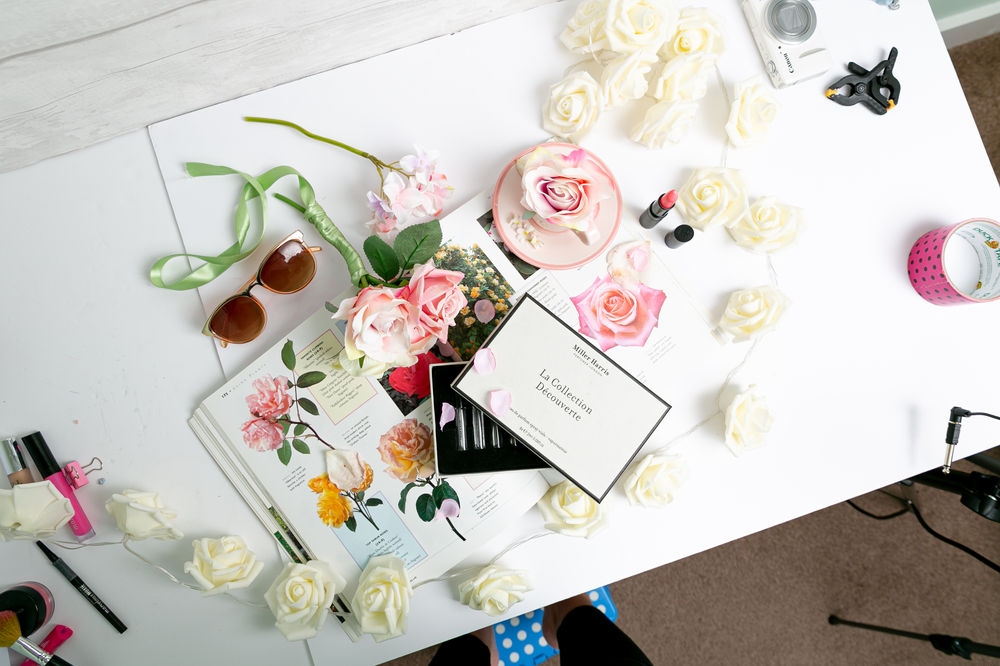
Place your biggest item. This could be your ‘hero’ product which is the item your image is all about. Here I’m using a beautiful old gardening book I picked up from a charity shop and I’ve opened it on the page all about roses. (because roses and pink is my theme and colour)
Step 2
Start bringing in the props you’ve chosen. Place them on and around your first item and keep moving them around until you’re happy with how it looks. Try looking at the picture from overhead, because after all that’s how you’re going to shoot the image.
Step 3
Once you’re happy with the look, if you’ve not yet, add in your main object. For me, this is the box of Miller and Harris perfumes all based on Rose scents. This is my ‘Hero’ item.
Now you’re ready to start taking pictures.
For this next part you need to get right over the picture, so I tend to use a stool or a chair to stand on and get directly overhead.
Use your camera on landscape and take an image directly overhead. Now analyse this image. Are you happy with how everything looks? Don’t worry if some props on the edges of the image are cropped out, this is a typical look to a flat lay. However if you want everything in the frame and it’s not, nows the time to start moving items to ensure the look you’re after.
Using the first image as a reference, move items around.
Once you’re happy take the second shot. Try slightly turning the camera so you shoot at an angle and keep doing this until you have the image you want.
Once you have the shot you want, the next thing is to edit them ready for publishing on social media or your website. (Remember if you’re doing this on your phone the pictures won’t be high enough resolution to use on a website. You’d need a professional photographer for that).
Edit your image until you have the look you want. Crop square for Instagram and for Facebook 1,200 x 628 pixels is the best size. For Twitter 1,200 x 675 pixels is the best size and for LinkedIn size to 1,104 x 736 pixels. There are lots of online editing tools and software available but if you have Photoshop that really is the best. If not try Gimp which is a free online software and acts similarly to Photoshop.
Hopefully, this has helped you, sparked some inspiration, and you can start creating some gorgeous, amazing awesome posts.
If you want to see this post as a video, then click below and view it on YouTube. We also provide a social media photography course via our website.
Go forth and create pretty.
Sarah xx


